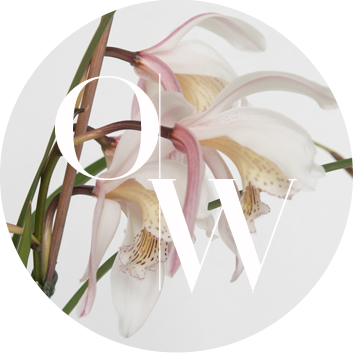
Dividing Cymbidium Orchids
Dividing Cymbidium Orchids
It’s an easy process, Dividing Cymbidium orchids, so don’t be scared!
Every now and then one of your Cymbidium orchids will outgrow it’s present pot. There may be too many back-bulbs on it, or you wish to give part of it to a friend, or sell part of it. So you will need to divide it.
Dividing Cymbidium orchids is best done in the spring, after flowering and during the growing season. However, owners of big collections do it all year round or when resources are available if they have to.
It might not be the best idea, but I repot or divide plants at all times of the year. Although I do try to avoid the hottest parts of Summer. Cymbidium orchids are tough plants and they can take it and recover quickly. But when you cut them in half you are putting them through quite a bit of stress. Don’t expect a division to flower the very next season, it may take another year or two!
It’s a simple process…
If the decision is to divide the plant, select new pots which will give each division room to grow. Ideally at least two year’s new growth. You don’t need to be disturbing it again too soon.
When you are dividing Cymbidium orchids, simply sever the rhizome connecting the bulbs, preferably by using a sterile knife or scissors.
It is also possible to grab the plant in both hands and break off the bulbs of the plant by levering them until the rhizome breaks. This is generally what I end up doing.
Also, remove any unwanted back-bulbs, which you can try to strike, but leave at least one or two back-bulbs with each division. Your new divisions will need plenty of stored nutrient to produce new shoots. So leave them a couple of extra bulbs to live on if needed.
Once the piece has been separated from the rest of the plant, clean up the bulbs. Break off any leaf husk remaining and trim off any broken leaves. This will keep the bulbs clean and prevent scale or any other insect from affecting your bulb.

Some will then tell you to seal the rhizome break to prevent infection with a sealing paste or fungicide. However, I never really bother with that step. It will heal on its own, and I can’t remember the last time I lost a plant to a fungal infection after dividing it.

Inspect your roots carefully….
Next, trim off excess roots and inspect them to ensure they are healthy. They should be a white/cream colour and nice and thick. Stringy dry roots that have no substance are dead, so trim them off. Dark colour/black roots are rotting, and should also be cut off. To prevent future rot issues, give your plant better conditions to grow. You may need to water the plant less, or give the plant a more free draining mix to live in.
Centralise the plant in the new pot, and add potting mix down the sides of the rootball, until the pot is almost full. Shake the pot and plant as you fill it, to try to eliminate spaces between the roots with no potting mix.
Ensure that the plant is not sitting too high in the pot. It is better to pot deeper than too shallow. Getting the right level is best, with your mix just covering the base of the bulb.
Stop filling at about 25mm (one inch) from the top, and add some organic fertiliser, then fill the pot, covering the fertiliser. I use a slow release fertiliser pellet in the pot so the roots can start absorbing food and grow stronger faster.
Strike Back pellet fertiliser is ideal for this and has worked well for me in the past.
The equivalent of about 2 level soup spoons of fertiliser (25 grams) to a 175mm pot (a small handful) and 3 spoons to a 200mm pot is about right. This soup spoon measurement is suggested because handfuls can vary in size markedly. It is universal and convenient.
If the plant being divided is thoroughly root-bound, don’t leave it that way. Either remove some of the existing roots, or at least tease them out, to encourage them to grow into the new potting mix. A root-bound plant just placed in a larger pot, without root pruning, or teasing out of the roots, is likely to just sit there. It likely won’t send the roots into the new growing medium, and will not thrive in that condition at all.
I use a simple black plastic pot for potting, and have found that this is probably the best pot for Cymbidium orchids. They are cheap, easy to work with and provide good drainage.
Dividing Cymbidium orchids is a great way to increase the size of your collection So when a plant’s size becomes a bit too much to manage, divide it!
Orchid Wise Society
With over 30 years of experience joining the Orchid Wise Society is a great way to join other orchid grower enthusiasts around the world. We promise not to overload your inbox with unnecessary rubbish, instead we pride ourselves on providing relevant & interesting information with regards to all things Cymbidium orchids.
We welcome your feedback on

